
Restaurant and Commercial Kitchen Painting: Health Code Requirements in Florida

You own a restaurant or manage a commercial kitchen facility and your walls, ceilings, and trim are looking tired and dingy. You need to refresh the space, but you’re concerned about health codes and food safety regulations. Can you just paint over existing surfaces? What materials are compliant? Will the health inspector approve your paint choices? These questions matter because non-compliant painting in a food service facility can result in citations, failed inspections, and operational consequences. Commercial kitchen painting isn’t like painting a residential kitchen. Food service facilities must meet specific Florida health code requirements that dictate which materials can be used, how surfaces must be prepared, and what finishes comply with food safety standards. Understanding these requirements before painting prevents expensive corrections later and ensures your facility passes health inspections. Florida Health Code Requirements for Food Service Facilities Florida’s Department of Business and Professional Regulation (DBPR) sets health code requirements for food service establishments. These rules are part of the Florida Administrative Code and specifically address food preparation areas, including walls, ceilings, and trim surfaces. All surfaces in food preparation areas must be smooth, cleanable, and non-absorbent. Rough or porous surfaces harbor bacteria and are difficult to clean properly. This eliminates certain painting options and requires specific finishes for compliance. Surfaces must be washable and capable of withstanding frequent cleaning with soap, water, and sanitizing agents. Paint must not degrade when exposed to food service cleaning chemicals or steam from cooking and cleaning operations. Latex paint won’t withstand these conditions in commercial kitchens. Surfaces must not absorb moisture or permit microbial growth. This requirement eliminates standard drywall in food preparation areas. Water-resistant surfaces like cement board or composite panels are required. Paint applied to these surfaces must be moisture-resistant and anti-microbial. Surfaces must be maintained in good condition with no peeling, chipping, or deterioration. Rough spots collect debris and bacteria. This requirement means paint must adhere well and remain intact throughout its service life. Paint used in food preparation areas cannot contain harmful substances or off-gas into food preparation areas. Low or zero VOC paints are required to avoid air quality issues in commercial kitchens. Wall and Ceiling Materials Compliance Standard drywall isn’t permitted in food preparation areas because it’s porous and absorbs moisture and grease. Food service facilities require water-resistant surfaces. Moisture-resistant drywall (green board) is acceptable in some areas but not ideal in food preparation zones. Tile is an excellent choice for food service kitchens. Glazed ceramic or porcelain tile is smooth, non-absorbent, and cleanable. Grout joints can be sealed for moisture resistance. Tile complies fully with health codes but is expensive to install. Fiberglass reinforced panels (FRP) are popular in commercial kitchens. These smooth, non-porous panels resist moisture and bacterial growth. They’re easier to install than tile and less expensive. FRP accepts paint well when properly prepared. Stainless steel is ideal for food preparation areas and complies fully with health codes. Steel reflects light, is extremely durable, and is fully cleanable. Cost is the primary limitation of stainless steel in kitchens. Composite panels and commercial-grade plastic laminates are acceptable when properly installed. These materials are non-porous, moisture resistant, and accept paint well. Once appropriate base materials are installed, paint applied over them must meet specific standards. For commercial painting services, selecting compliant materials for the underlying substrate is as important as selecting compliant paint. Paint Types Compliant With Health Codes Standard latex or oil-based residential paint is not compliant in food service areas. These paints don’t provide adequate moisture resistance, chemical resistance, or antimicrobial properties required by health codes. Epoxy paint is the most common choice for commercial kitchen walls. Two-part epoxy systems create hard, durable, moisture-resistant finishes that withstand harsh cleaning chemicals and steam. Epoxy paint is non-porous, prevents microbial growth, and maintains integrity through repeated cleaning. Epoxy paint requires careful mixing and application but delivers superior performance in food service environments. Professional application is strongly recommended for epoxy kitchens to ensure proper curing and durability. Polyurethane coatings are another compliant option. These create flexible, durable finishes resistant to moisture and chemicals. Polyurethane is easier to apply than epoxy and offers good long-term durability. Food-grade acrylic coatings formulated specifically for commercial kitchens are available from specialty manufacturers. These are more moisture and chemical resistant than standard acrylics but less durable than epoxy or polyurethane. Antimicrobial paint additives are available and recommended for food service areas. These additives prevent bacterial and mold growth on paint surfaces, enhancing food safety. Low or zero VOC formulations are required in commercial kitchens for air quality. High-VOC paints off-gas harmful fumes in food preparation areas and are not compliant. Specific Areas and Their Requirements Food preparation surfaces where food comes into direct contact require specialized coatings. If paint is used in areas where food is prepared on uncovered surfaces, FDA food-contact surface requirements apply. Most facilities avoid painting actual food contact surfaces, instead using stainless steel or food-grade cutting boards. Walls adjacent to food preparation areas require moisture-resistant, cleanable paint. These areas experience splash, steam, and grease exposure. Epoxy or polyurethane paint prevents absorption of these contaminants. Ceilings in food service kitchens must also meet code requirements. Moisture and grease from cooking operations rise and condense on ceilings. Ceilings must be smooth, non-absorbent, and resistant to moisture damage. Epoxy ceiling paint is standard in commercial kitchens. Trim, door frames, and equipment mounting areas must comply with the same requirements. No porous or absorbent materials are permitted. Paint must resist moisture, grease, and cleaning chemicals. Storage areas for food and supplies have less stringent requirements than food preparation areas but still must meet basic health code standards. Paint must be durable and washable even if antimicrobial properties are less critical. For hospitality and hotel painting services, commercial kitchens in hotel restaurants must meet identical health code requirements as standalone restaurants. Surface Preparation for Compliance Proper preparation is critical for paint compliance and durability. All existing loose paint, grease, and debris must be removed. Pressure washing with degreaser removes accumulated grease
How to Paint Wood Fences in Florida: Make Them Last in Sun and Rain

Your wood fence looked great when it was new, but years of Florida sun, humidity, and rain have taken their toll. The finish is fading, boards are graying, and you’re noticing some soft spots indicating potential rot developing. You’re wondering whether you should paint, stain, or seal the fence, and whether any finish will actually last in Florida’s challenging climate. Wood fences face intense environmental assault in Florida. Intense UV radiation fades finishes and damages wood fibers. High humidity promotes mildew and fungal growth that darkens wood and eventually causes structural damage. Frequent rain and moisture penetration lead to rot if wood isn’t properly protected. Salt air near coastal areas accelerates all these problems dramatically. The good news is that properly finished and maintained wood fences can last 15 to 20 years in Florida. The key is understanding which finishes work best, how to prepare wood properly, and what maintenance schedule keeps your fence protected year-round. Understanding Your Fence’s Current Condition Before deciding on paint, stain, or sealer, assess your fence’s current state. Run a screwdriver or awl along boards and posts. If it sinks easily into wood with minimal resistance, rot has already started. Heavily rotted wood needs replacement before finishing. Paint won’t save rotted wood. If wood feels hard and solid but the surface is gray and weathered, the fence is sound structurally but unprotected on the surface. This is ideal for refinishing with paint or stain. If the existing finish is peeling or flaking, you’re dealing with finish failure rather than wood damage. Check for mildew or fungal growth appearing as dark streaks or patches. Surface mildew doesn’t indicate structural problems but indicates moisture penetration that will cause problems if not addressed. Mold-resistant products are essential for Florida wood fences. Look for any signs of insect damage including termite galleries or carpenter ant activity. If you find active insect damage, treat the problem before finishing. Paint covers but doesn’t solve insect problems. Paint vs. Stain vs. Sealer for Florida Fences Each finish type has different advantages for Florida’s climate. Paint provides opaque color coverage and the most UV protection. Quality exterior paint creates a protective film that shields wood from sun and weather. Paint lasts 3 to 5 years typically in Florida before fading and requiring refresh. Paint works best on fences where you want bold colors and maximum UV protection. The opaque coverage hides wood grain and any surface imperfections. Paint adheres well to previously painted wood. The downside is that paint eventually peels if not maintained, and refreshing requires the same preparation as initial painting. Stain penetrates wood rather than coating the surface. Semi-transparent stain shows wood grain while providing color and some UV protection. Solid stain is opaque like paint but still penetrates rather than coating. Stain lasts longer than paint in Florida, typically 4 to 7 years before requiring reapplication. Stain creates a more natural appearance than paint while providing good durability. Stain doesn’t peel like paint, so maintenance is simpler. The downside is that stain offers less UV protection than paint, so fading happens faster. Restaining requires less intensive prep than repainting. Sealer provides minimal color change while creating a protective film over wood. Clear sealer shows wood grain beautifully but provides the least UV protection. Sealer lasts 2 to 3 years in Florida’s harsh climate before needing reapplication. Sealer is best for fences where you want to preserve natural wood appearance. Most Florida fence owners choose paint for maximum durability and color options, or semi-transparent stain for natural appearance with good durability. Sealer alone isn’t sufficient protection for Florida’s UV intensity. Essential Surface Preparation Preparation determines how long your finish lasts. Never skip this critical step. Start by pressure washing the fence at 1,500 to 2,500 PSI to remove dirt, mildew, algae, and loose finish. Use proper technique to avoid damaging wood. Stand at an angle rather than directly perpendicular to the surface. Hold the nozzle 12 to 24 inches from the wood. After pressure washing, inspect for mildew that needs additional treatment. For stubborn mildew, apply oxygen bleach or mildew remover, let sit per manufacturer instructions, and rinse thoroughly. Never paint over mildew. It will grow through any finish within months. Allow the fence to dry completely after cleaning. In Florida’s humidity, this takes at least 48 to 72 hours. Moisture trapped under finish causes adhesion failure and rot acceleration. Don’t rush this step. Sand the fence lightly to remove any remaining loose finish and create tooth for paint or stain adhesion. You don’t need to remove all existing finish if it’s well-adhered, just roughen the surface. Use 80 to 120 grit sandpaper and sand in the direction of the wood grain. Fill any holes, gaps, or damage with exterior wood filler. Sand repairs smooth once dry. Caulk any gaps between boards where water can penetrate and cause rot inside the fence. Use paintable, flexible caulk designed for exterior use. After sanding, wipe down all surfaces with damp cloths to remove dust. Allow to dry completely before finishing. Product Selection for Florida Conditions Choose products specifically formulated for exterior use in humid climates. Standard interior paint will fail quickly on outdoor fences. Look for paint or stain rated for exterior wood with UV protection and mildew resistance. For paint, acrylic latex exterior paint designed for wood works well in most situations. Oil-based or alkyd paint offers superior water repellency but is harder to clean up. For Florida’s heat, latex paint is generally preferred as it’s more flexible with temperature swings. Look for paint with mildewcide additives already included. This is essential for Florida fences that will inevitably face moisture and humid conditions. Some premium paints include additional algae resistance which prevents green growth common on north-facing or shaded fences. For stain, semi-transparent exterior stain penetrates wood while providing color and protection. Solid stain offers more UV protection and opaque coverage but still penetrates rather than coating. Choose based on whether you want to see wood grain. For professional exterior
Refreshing Your Business Interior: How New Paint Boosts Customer Experience

First impressions happen fast. Within seconds of walking through your door, customers form an opinion about your business — and the condition of your walls is a bigger part of that snap judgment than most owners realize. Scuffed baseboards, faded paint, scratched corners, and dated colors quietly signal that no one’s paying attention to the details. A clean, current, well-chosen interior signals the opposite: that you run a sharp operation and care about the experience you’re providing. For Florida business owners, an interior repaint is one of the most cost-effective ways to elevate the customer experience without the expense and disruption of a full renovation. Here’s how the right paint job pays for itself — and how to plan one that strengthens your brand instead of just covering a few marks. Color shapes how customers feel and behave Color isn’t merely decoration; it influences mood, perception, and even behavior. The ideal palette depends on what you want customers to feel the moment they walk in and while they linger: Calm and trust — soft blues, greens, and warm neutrals suit medical and dental offices, spas, salons, and financial services, where you want people to feel at ease and reassured Energy and appetite — warm tones with strategic red, orange, or yellow accents work for restaurants, cafes, and retail, where you want a lively, inviting buzz Focus and professionalism — muted, confident neutrals with a single strong accent color project competence for offices, law firms, and consultancies Brand alignment — pulling your wall colors from your logo and brand palette reinforces recognition and makes the space feel intentional and cohesive A professional painter can help you balance current trends, your brand identity, and timelessness, so the space looks fresh now without forcing you to repaint again in two years when a trend fades. Commercial interiors need commercial-grade durability A business interior takes far more abuse than a home — heavier foot traffic, more hands brushing the walls, carts and equipment bumping corners, and frequent cleaning. The products have to be built for it. That means: Scrubbable, high-durability finishes — satin and semi-gloss in high-touch areas so marks wipe away instead of soaking in Stain- and scuff-resistant products in lobbies, corridors, and restrooms where wear concentrates Mildew-resistant paint for Florida’s humidity, particularly in restrooms, break rooms, and back-of-house areas Easy-to-touch-up colors so future scuffs can be spot-fixed without repainting an entire wall Cutting corners on product to save a little upfront usually means repainting sooner — which costs more over time and brings more operational disruption with each redo. In a commercial setting, durability is economy. Scheduling around your business is the real challenge For most owners, the biggest concern isn’t the paint itself — it’s the downtime. Every hour your doors are closed or your team is working around ladders is an hour of lost productivity or revenue. This is where an experienced commercial crew earns its keep. A good one works around your hours: after close, overnight, on weekends, or in phased sections so part of the space stays open while another is being painted. Clear scheduling, defined work zones, and steady communication are what separate a smooth commercial project from a disruptive one. Minimizing disruption to staff and customers Beyond timing, the details matter: containing dust and odors, using low-VOC paints so the air stays comfortable and the space can reopen quickly, keeping clear and safe walkways, protecting inventory and equipment, and cleaning up thoroughly at the end of each shift. A crew that respects your operation leaves no trace behind except better-looking walls. When you request quotes, ask specifically how the contractor plans to keep your business running during the work — the answer reveals how much commercial experience they really have. High-impact areas to prioritize on a budget If a full repaint isn’t in this quarter’s budget, concentrate your dollars where customers actually look and form impressions: The entrance and lobby — your make-or-break first impression, and the highest-leverage area to refresh Customer-facing walls and waiting areas — wherever people sit, stand, and wait, they’re studying your space Restrooms — fairly or not, customers judge a whole business by the state of its restroom Accent and feature walls — a single bold, on-brand wall can transform a room’s energy for very little cost The return on a fresh interior A repainted interior does more than look nice. It can lift how customers perceive your quality and pricing, improve employee morale and pride in the workplace, photograph far better for your website and social media, and even enhance the value and appeal of your leased or owned space. Few investments touch so many parts of the business — brand, staff, and customer experience — for so modest a cost relative to remodeling. Plan around your busy season In Florida, many businesses see seasonal swings, so timing a repaint during a slower stretch minimizes the impact on revenue and makes scheduling far easier. Planning a few weeks ahead also lets you choose colors carefully, order any specialty products, and coordinate the work in phases rather than scrambling. A little lead time turns a potential headache into a seamless upgrade. Keeping your interior looking sharp between repaints A commercial repaint is an investment, and a little upkeep stretches it much further. Keeping a record of the exact colors, products, and finishes used makes future touch-ups quick and seamless, so a scuffed corner or a marked-up hallway can be spot-fixed in minutes instead of growing into a full repaint. Training staff to clean walls gently with the right products avoids burnishing or stripping the finish, and addressing small marks promptly keeps them from becoming permanent. With durable paint and simple maintenance, a well-done commercial interior can look fresh for years before it needs a full refresh. Five Seasons Painting handles commercial interiors across Florida with crews that work around your schedule, not against it — after hours, overnight, or in phases, with minimal disruption to your customers and staff. Contact us for a free walkthrough and a detailed estimate tailored to your
Warehouse and Industrial Painting: Durable Solutions for Florida Facilities

Industrial and warehouse facilities face painting challenges that dwarf residential concerns. These massive spaces deal with heavy equipment traffic, chemical exposure, extreme temperature variations, demanding cleanliness standards, and regulatory compliance requirements. In Florida, add intense heat, high humidity, and for coastal facilities, corrosive salt air to the mix. A poorly executed industrial paint job isn’t just an aesthetic problem—it’s a safety issue, a maintenance nightmare, and a financial drain. Paint that fails prematurely in a 100,000 square foot warehouse means production disruptions, safety hazards from chipping or peeling surfaces, and tens of thousands of dollars in premature repainting costs. Understanding what industrial and warehouse painting truly requires—from surface preparation through product selection to application techniques—helps facility managers make informed decisions that protect their investments and maintain safe, compliant operations. Why Industrial Painting Differs From Commercial or Residential Industrial environments demand different approaches than office buildings or homes. The scale alone changes everything—warehouses often measure 50,000 to 200,000+ square feet with ceiling heights of 20-40 feet or more. Standard residential painting equipment and techniques simply don’t work at this scale. Durability requirements far exceed typical standards. Industrial floors withstand forklift traffic, chemical spills, impact from dropped materials, and constant abrasion. Walls face impact from equipment, chemical splashes, and extreme temperature variations. Ceilings must resist moisture, heat, and in some cases, chemical vapors. Safety and compliance issues are paramount. Industrial facilities must meet OSHA standards, fire codes, environmental regulations, and often industry-specific requirements. Paint must be appropriate for the facility’s operations—food processing plants need FDA-compliant coatings, chemical plants need chemical-resistant products, and manufacturing facilities need coatings that won’t contaminate products. Downtime costs make scheduling critical. Every hour a production facility is offline for painting costs money. Projects must be planned meticulously to minimize operational disruption. For facilities requiring professional industrial painting services, understanding these unique demands separates adequate contractors from truly qualified industrial painting specialists. Work must often happen during off-hours—nights, weekends, or brief shutdown periods—requiring contractors who can mobilize large crews and work efficiently under time pressure. Floor Coating Systems for Industrial Facilities Industrial floors take the most abuse and require the most specialized coatings. Epoxy floor coatings are the industrial standard for good reason. They create hard, durable surfaces that resist chemicals, abrasion, and impacts. Two-part epoxy systems chemically cure rather than just drying, creating incredibly strong bonds and durable surfaces. Standard epoxy works for light to moderate industrial use—assembly areas, storage zones with minimal forklift traffic, and general warehouse spaces. It typically lasts 5-10 years with proper maintenance. High-build epoxy provides thicker coating that handles heavier abuse. It’s appropriate for areas with constant forklift traffic, frequent chemical exposure, or heavy impact. Properly applied high-build epoxy can last 10-15 years even in demanding environments. Urethane topcoats over epoxy provide the ultimate durability. The epoxy base bonds to concrete while the urethane topcoat provides superior abrasion and chemical resistance plus UV stability. This system works for the most demanding industrial applications and can last 15-20+ years. Polyaspartic coatings cure extremely fast, allowing floors to return to service within hours rather than days. They’re ideal when downtime must be minimized, though they cost more than standard epoxy. Methyl methacrylate (MMA) coatings cure in freezing temperatures and high humidity—crucial for Florida facilities that can’t be climate controlled during application. They’re more expensive but offer unique advantages for challenging situations. For warehouse and distribution centers, slip-resistant additives are often incorporated into floor coatings to improve safety. These can be aggregate additives mixed into the coating or broadcast into wet coating for maximum traction. Color coding different zones—receiving, storage, packing, shipping—with different floor coating colors improves workflow efficiency and safety. This is common in modern warehouse design. Wall and Ceiling Coating Systems Industrial walls and ceilings face different challenges than floors but still require specialized products. High-performance epoxy or urethane wall coatings provide chemical resistance for facilities with splash zones or chemical storage areas. These hard, cleanable surfaces resist staining and damage. Elastomeric coatings work well for exterior metal building walls common in Florida. They seal against moisture, bridge minor cracks, and provide excellent weather resistance. For interior concrete block walls—extremely common in Florida warehouse construction—block filler followed by high-quality acrylic or epoxy paint provides durability and cleanability. Ceiling coatings in warehouses often prioritize light reflectivity to maximize illumination from high-bay lighting. Bright white, high-reflectivity ceiling coatings can reduce lighting costs by improving light distribution. Some industrial ceiling coatings contain fire-retardant additives to improve safety and meet code requirements. In food processing facilities, special antimicrobial coatings prevent bacterial growth on walls and ceilings. These FDA-compliant products are essential for maintaining sanitary conditions. For facilities with temperature-controlled zones, insulating coatings can improve energy efficiency by reducing heat transfer through walls and roofs. Surface Preparation: The Foundation of Durability Industrial painting’s success depends on thorough surface preparation—even more so than residential or commercial work. For concrete floors, this typically means diamond grinding or shot blasting to create proper surface profile. The concrete must be clean, dry, and properly profiled for coatings to bond. Oil and chemical contamination must be completely removed. Industrial degreasers, acid etching, or mechanical removal might be necessary. Any contamination left on concrete prevents coating adhesion and causes premature failure. Cracks and damaged areas need repair before coating. Epoxy crack fillers, concrete patching compounds, or in severe cases, saw-cutting and replacing damaged sections might be necessary. For metal surfaces, rust removal is critical. Wire brushing, sandblasting, or chemical rust removal must eliminate all corrosion before painting. Any rust remaining under paint continues spreading and causes coating failure. Metal surfaces need appropriate primers—rust-inhibiting primers for steel, etching primers for aluminum, specialized primers for galvanized metal. Each metal type requires specific products for proper adhesion. Existing failed coatings must be removed. Sometimes complete removal is necessary, other times scarifying (roughening) the surface and removing loose material suffices. The assessment depends on coating condition and what new coating system will be applied. Proper preparation takes 50-70% of project time and budget but determines whether coatings last
Wood Rot Repair Before Painting: What Florida Homeowners Need to Know

You’re planning to paint your home’s exterior and during your inspection, you notice some soft, spongy wood around a window frame or on your fascia board. You press it with your finger and it gives way more than it should. That’s wood rot, and painting over it is one of the worst mistakes you can make. Wood rot is insidious. It hides under seemingly intact paint, spreads invisibly within wood structures, and compromises your home’s integrity while you’re unaware. In Florida’s humid climate with frequent rain and high moisture levels, wood rot is incredibly common. Understanding how to identify it, repair it properly, and prevent it from returning is essential knowledge for any homeowner planning painting projects. Understanding Wood Rot in Florida Wood rot is caused by fungi that feed on wood in the presence of moisture. These organisms break down wood’s cellular structure, turning solid lumber into soft, crumbly material that loses all structural integrity. Two main types affect Florida homes. Dry rot, despite its name, requires moisture to start though it can continue with less moisture once established. It spreads through wood more aggressively and can travel through masonry to reach new wood. Dry rot is brown, causes wood to crack in cube-like patterns, and crumbles into powder when disturbed. Wet rot requires sustained moisture and is more common than dry rot in Florida. It makes wood soft and spongy, often appears darker than surrounding wood, and may have a musty, earthy smell. Wet rot typically stays localized to moisture-affected areas rather than spreading extensively. Both types destroy wood and must be addressed before any exterior painting project. Paint simply masks the problem temporarily while rot continues destroying your home’s structure underneath. Why Florida Homes Are Particularly Vulnerable Florida’s climate creates perfect conditions for wood rot. Our high humidity provides the moisture fungi need. Frequent afternoon thunderstorms and heavy seasonal rain soak wood regularly. Warm temperatures year-round mean rot-causing fungi stay active constantly rather than going dormant in winter. Poor ventilation in enclosed spaces like soffits, crawl spaces, and wall cavities traps moisture where it can’t dry. Many Florida homes built in past decades used wood products not rated for high-moisture environments, making them particularly vulnerable. Coastal areas face additional challenges from salt air, which accelerates deterioration and creates conditions even more favorable for rot. For commercial painting projects near the coast like hospitality & hotel painting, wood rot inspection and repair become even more critical. Identifying Wood Rot Finding wood rot before it causes catastrophic damage requires knowing where to look and what signs indicate problems. Common locations include window and door frames where caulk has failed, allowing water penetration. Fascia boards and trim along rooflines where gutters overflow or leak. Deck boards, railings, and posts exposed to weather. Siding near ground level where splash-back from rain hits. Areas where different materials meet and water can penetrate. Any wood shaded by vegetation or structures where moisture doesn’t dry quickly. Visual signs include paint that’s bubbling, peeling, or cracking in localized areas. Wood that appears darker or discolored compared to surrounding areas. Soft, spongy texture when you press on wood. Visible fungal growth—often white, stringy material or mushroom-like growths. Cracking or crumbling wood that breaks apart easily. The screwdriver test is the classic method for identifying rot. Press a screwdriver or similar tool into suspicious wood. Solid wood resists penetration. Rotted wood allows the screwdriver to sink in easily, and you may feel the wood compress or crumble under pressure. Don’t rely solely on visual inspection from the ground. Use a ladder to examine upper areas closely, and check enclosed spaces like under decks and in crawl spaces where rot often hides. Assessing the Extent of Damage Once you’ve found rot, determine how extensive the problem is before deciding on repair strategies. Surface rot affects only the outermost layers of wood and can often be scraped away, revealing solid wood underneath. This is the easiest type to repair. Significant rot penetrates deeper but hasn’t completely destroyed the structural member. Part of the board remains solid. These situations may allow partial repair depending on the wood’s function and load-bearing requirements. Complete rot means the entire cross-section of wood is compromised. Structural members with complete rot must be replaced—there’s no safe repair option. Attempting to repair rather than replace creates safety hazards and liability issues. For interior painting projects, check areas around windows, in bathrooms, under sinks, and anywhere moisture exposure occurs. Interior wood rot is less common but still possible, especially in Florida’s humid climate. DIY vs. Professional Assessment Homeowners can identify obvious rot and handle minor surface repairs. However, professional assessment is worthwhile for several reasons. Experienced contractors can identify rot that’s not yet visible, assess whether damage is cosmetic or structural, and determine if water intrusion is ongoing or if the source has been fixed. For structural concerns—rot in load-bearing members, extensive rot affecting multiple areas, or situations where you’re unsure if replacement is necessary—consult professionals. Structural repairs done incorrectly create serious safety issues and liability when you eventually sell. Building permits may be required for structural repairs. Professionals understand local requirements and ensure work meets code, which protects you legally and ensures repairs are done safely. Repairing Surface Wood Rot For minor surface rot where underlying wood remains solid, DIY repair is straightforward. Start by identifying and fixing the moisture source. If you repair rot without addressing why wood got wet, rot will return quickly. This might mean recaulking windows, fixing gutters, improving drainage, or addressing roof leaks. Scrape away all rotted wood using a paint scraper, wire brush, or similar tool. Remove everything soft or questionable until you reach solid wood. It’s better to remove too much than too little—any remaining rot will continue spreading. Let the area dry completely before proceeding. In Florida’s humidity, this might take several days. Use fans or dehumidifiers if needed. Wood must be thoroughly dry for repair products to work properly. Apply wood hardener to the damaged area.
Popcorn Ceiling Removal and Painting: What Florida Homeowners Should Know

Walk into most Florida homes built between the 1950s and 1990s, and you’ll likely see them—popcorn ceilings with that bumpy, textured surface that once seemed like a good idea. Also called acoustic ceilings or cottage cheese ceilings, these textured surfaces were popular for decades because they hid imperfections, provided some sound dampening, and were quick to apply during construction. But times have changed. Today’s homebuyers and homeowners overwhelmingly prefer smooth, modern ceilings. Popcorn texture makes rooms feel dated, collects dust and cobwebs, and is nearly impossible to clean. If you’re considering removing that popcorn texture, you’re not alone—it’s one of the most requested home updates in Florida. Before you grab a scraper and start working, there are important things you need to know, especially if your home was built before 1980. The Asbestos Issue You Can’t Ignore Here’s the critical safety concern: popcorn ceiling texture applied before the mid-1980s often contains asbestos fibers. Asbestos was added to ceiling texture because it strengthened the material and provided fire resistance. The problem? Asbestos is extremely hazardous when airborne fibers are inhaled, causing serious lung diseases and cancer. If your home was built before 1980, you must assume your popcorn ceiling contains asbestos until proven otherwise. Do not attempt removal yourself. Even homes built in the early 1980s might have asbestos-containing texture if builders used up old stock of materials. The only way to know for certain is professional asbestos testing. A small sample is sent to a lab for analysis, with results typically available within a week. Testing costs $50-150 per sample and is money well spent for your safety. If asbestos is present, removal requires licensed asbestos abatement professionals who follow strict safety protocols. This significantly increases costs—often $3-7 per square foot compared to $1-3 per square foot for non-asbestos removal. However, there’s no safe way to DIY asbestos removal, and doing so is illegal in Florida. For homes built after 1990, asbestos is unlikely but not impossible. When in doubt, test. Your health is worth far more than the testing cost. Removal vs. Covering: Your Two Main Options Once you’ve confirmed your ceiling is asbestos-free, you have two approaches: complete removal or covering the texture. Removal involves spraying the ceiling with water to soften the texture, then scraping it off. This is messy, labor-intensive work that creates enormous amounts of debris. You’ll need to protect floors and furniture completely, and cleanup is substantial. After scraping, the ceiling requires skim coating to create a smooth surface, sanding, priming, and painting. Covering the texture means installing a new layer of drywall directly over the existing popcorn ceiling. This avoids the mess of removal but reduces ceiling height by about half an inch and requires careful work around light fixtures and ceiling fans. The advantage is that it’s cleaner and often faster than removal. The DIY Reality Check Removing popcorn ceiling is physically demanding, extremely messy, and more difficult than it appears. If you’re considering DIY, be honest about several factors. The physical demands are substantial—you’ll spend hours working overhead with your arms raised, which is exhausting. One room can take an entire weekend for a novice. The mess is incredible—wet texture falls everywhere despite your best efforts with drop cloths, and dust from sanding afterward gets into everything. Results often disappoint DIYers. Achieving a perfectly smooth ceiling requires skill in skim coating and sanding. Most homeowners end up with visible imperfections, waves, or texture differences that bother them every time they look up. Many eventually hire professionals to fix their DIY attempts, spending more overall than if they’d hired pros from the start. When Professional Help Makes Sense Professional popcorn ceiling removal makes sense in most situations. Pros complete the work faster with better results, handle asbestos testing and abatement if needed, have specialized equipment that minimizes mess, and deliver smooth, professional finishes. For whole-house projects, multiple rooms, or homes with asbestos concerns, professional services aren’t just recommended—they’re essential. Commercial projects like office painting that include ceiling updates almost always require professional work to meet building codes and appearance standards. The Process: What to Expect Understanding the process helps set realistic expectations whether you hire pros or attempt DIY on a confirmed asbestos-free ceiling. First, everything must be removed from the room—furniture, decorations, fixtures if possible. Floors and walls get protected with heavy plastic sheeting taped securely. The ceiling is sprayed with water to soften the texture, though some stubborn areas may need multiple applications or longer soaking time. Scraping involves systematically working across the ceiling with a wide scraper, removing the softened texture. This step creates most of the mess. After scraping, the underlying drywall is assessed for damage, holes are patched, and the entire surface receives skim coating—applying thin layers of joint compound to create smoothness. Once dry, the ceiling is sanded smooth, which creates fine dust that penetrates everywhere despite containment efforts. After cleaning, primer is applied followed by ceiling paint. The entire process for one room takes 3-5 days including drying time. Painting Your Newly Smooth Ceiling Once texture is removed and the surface is smooth, proper painting ensures beautiful, lasting results. Ceiling paint differs from wall paint—it’s formulated to minimize drips and provides better hiding power for the slight imperfections that remain even after careful finishing. Most ceilings look best in flat white, which hides minor flaws and reflects light beautifully. If your ceiling has stains or previous water damage, use stain-blocking primer before finish paint. For kitchen cabinet painting projects paired with ceiling updates, coordinating the timing creates a complete kitchen transformation with minimal disruption. Two coats of quality ceiling paint typically provide even coverage and color. Don’t skimp on paint quality—cheap ceiling paint requires more coats and still may not hide imperfections well. Cost Expectations for Florida Homes Professional popcorn ceiling removal in Florida typically costs $1-3 per square foot for asbestos-free ceilings, or $3-7 per square foot if asbestos abatement is required. A standard 12×12 room runs $300-800 for removal, finishing, and painting
How Long Does Exterior Paint Last in Florida’s Climate?

You just spent thousands of dollars on a fresh exterior paint job, and your home looks fantastic. But you’ve heard stories from neighbors—paint that started peeling after just a few years, fading that happened way too quickly, mildew taking over within months. Now you’re wondering: how long will your paint job actually last in Florida’s challenging climate? The answer isn’t as simple as you might hope. While paint manufacturers might claim their products last 10-15 years, Florida’s intense sun, high humidity, salt air, and volatile weather conditions tell a different story. Understanding what affects paint longevity in our state helps you set realistic expectations and make smart decisions about products, maintenance, and when it’s time to repaint. The Reality of Paint Life in Florida Let’s start with honest expectations. In Florida, quality exterior painting with premium products and proper application typically lasts 7-10 years before needing a complete repaint. That’s significantly shorter than the 15-20 years you might get in milder climates, but it reflects the reality of our environment. Lower-quality paint or poor application can reduce that lifespan to just 3-5 years. On the flip side, the absolute best conditions—premium paint, expert application, ideal surface preparation, regular maintenance, and somewhat protected exposure—might stretch to 12-15 years in certain situations. The difference between these scenarios comes down to several controllable factors and some that are beyond your control. Understanding both helps you maximize your investment. Why Florida Is So Hard on Exterior Paint Our state’s climate creates a perfect storm of challenges for exterior paint. Let’s break down what your home’s exterior is dealing with every single day. Intense UV Radiation Florida receives some of the most intense sunlight in the United States. UV rays break down paint’s chemical bonds, causing fading, chalking, and degradation. South-facing walls and surfaces in full sun take the hardest hit. Dark colors fade faster than light colors because they absorb more heat, accelerating breakdown. This constant bombardment from the sun is relentless. Even on cloudy days, UV radiation reaches your home’s exterior. Over years, this exposure inevitably takes its toll. High Humidity and Moisture With humidity levels regularly above 70% and frequent rain, Florida’s moisture levels create ideal conditions for mildew and mold growth. Paint that isn’t formulated to resist these organisms will quickly develop those telltale black spots and streaks. Moisture also penetrates paint films, especially if there are any tiny cracks or imperfections. This moisture can cause paint to peel, blister, or lose adhesion to the surface underneath. In coastal areas, this problem intensifies. Temperature Extremes and Fluctuations While we don’t have harsh winters, Florida’s heat is its own challenge. Surface temperatures on exterior walls can exceed 150°F on summer afternoons. This heat causes paint to expand. At night, cooler temperatures cause contraction. This constant expansion and contraction stresses paint films, leading to cracking and failure over time. Salt Air in Coastal Areas If your home is within a few miles of the coast, salt air adds another layer of challenge. Salt is corrosive and accelerates paint breakdown. Coastal homes almost always need repainting more frequently than inland properties—often every 5-7 years rather than 7-10 years. Severe Weather Events Hurricanes, tropical storms, and severe thunderstorms are part of Florida life. High winds, driving rain, and flying debris can physically damage paint surfaces. Even homes that escape major storm damage often sustain enough minor damage to compromise paint protection. Factors That Extend Paint Life While you can’t control the weather, you can control several factors that significantly impact how long your paint lasts. Quality of Paint Products This cannot be overstated: premium paint lasts dramatically longer than cheap paint. High-quality exterior paint contains better pigments, resins, and additives that resist fading, mildew, and moisture penetration. For Florida specifically, look for paint marketed as having high mildew resistance, UV protection, and flexibility to handle temperature changes. Products designed for tropical or coastal climates perform better here than standard formulations. Yes, premium paint costs more upfront—sometimes twice as much per gallon as budget options. But when premium paint lasts 8-10 years versus 3-5 years for cheap paint, you actually save money in the long run. For parking garage painting or other commercial projects where durability is crucial, premium products are absolutely essential. Proper Surface Preparation How surfaces are prepared before painting matters as much as the paint itself. Paint applied over dirty, chalky, or flaking surfaces won’t adhere properly and will fail quickly regardless of quality. Professional preparation includes pressure washing to remove all dirt, mildew, and loose paint, scraping and sanding to create smooth surfaces, repairing damaged areas properly, and priming bare wood or other porous surfaces. Skipping or rushing through preparation is the fastest way to ensure premature paint failure. This is one reason why cheap painting services that cut corners on prep work deliver disappointing results. Application Technique Paint must be applied correctly to perform as designed. This means appropriate thickness—not too thin, not too thick—proper coverage with adequate coats, correct conditions during application (temperature and humidity), and attention to detail in all areas, especially vulnerable spots like trim and window frames. Professional painters understand these nuances. They know how much paint to apply, when to wait between coats, and how to handle tricky areas. For high-rise building painting projects, this expertise becomes even more critical as conditions change at different heights and exposures. Color Choice Lighter colors reflect heat and UV radiation, which means they last longer than dark colors. White, cream, light gray, and pastel shades typically hold up best in Florida. Deep blues, reds, blacks, and other dark colors fade noticeably faster. If you love dark colors, expect to repaint more frequently or budget for the highest-quality paint with maximum UV protection. Some manufacturers offer specific formulations for dark colors that perform better, though they still won’t match the longevity of lighter shades. Exposure and Protection Not all sides of your home age equally. South and west-facing walls receive the most sun and deteriorate faster. North-facing walls stay
Why Is My Interior Paint Bubbling? Common Causes and Solutions

You just finished painting your living room or hired professionals to give your home a fresh look, and everything seemed perfect. But now, weeks or months later, you notice unsightly bubbles forming on your walls. It’s frustrating, it looks unprofessional, and you’re wondering what went wrong. Paint bubbling, also called blistering, is more common than you think, especially in Florida’s humid climate. The good news? Once you understand what causes it, you can fix it and prevent it from happening again. What Causes Paint to Bubble? Paint bubbles form when the paint film loses adhesion to the surface underneath. Instead of lying flat, the paint lifts away from the wall, trapping air or moisture underneath. Several factors can trigger this problem, and identifying the root cause is the first step toward a lasting solution. Moisture Is the Main Culprit In Florida, moisture is enemy number one when it comes to paint problems. When water gets trapped between the paint and the wall surface, it creates pressure that pushes the paint outward, forming bubbles. This moisture can come from several sources. High humidity levels in bathrooms, kitchens, and laundry rooms create the perfect environment for paint bubbling. If you notice bubbles in these areas, moisture is likely the cause. Water leaks from pipes, roofs, or windows can also seep into walls and cause paint to blister. Sometimes the problem isn’t visible until the paint starts bubbling. Interior painting in Florida homes requires special attention to moisture control. Proper ventilation and addressing any water intrusion issues before painting are essential steps that professional painters always take. Painting Over Dirty or Greasy Surfaces Paint needs a clean surface to adhere properly. If walls weren’t cleaned before painting, dirt, dust, grease, or soap residue can prevent the paint from bonding correctly. This is especially common in kitchens where cooking grease accumulates on walls, or in bathrooms where soap scum builds up. When paint can’t grip the surface, it eventually lifts and forms bubbles. This is why professional painting services always include thorough surface preparation as part of the process. Applying Paint in Poor Conditions Temperature and humidity matter when you’re painting. If paint is applied when it’s too hot, too cold, or too humid, it won’t cure properly. In Florida’s climate, painting during the hottest part of the day or in rooms with poor air circulation can cause problems. Direct sunlight hitting freshly painted walls can also cause the outer layer to dry too quickly while the layer underneath is still wet, trapping moisture and creating bubbles. Painting Over a Wet Surface This seems obvious, but it happens more often than you’d think. If the previous paint layer, primer, or the wall itself hasn’t fully dried before applying the next coat, moisture gets trapped. This is particularly problematic after cleaning walls or dealing with water damage. Using Low-Quality Paint or Wrong Paint Type Not all paints are created equal. Cheap paint often lacks the proper binders and resins needed to create a durable, flexible film. In Florida’s challenging environment, using quality paint makes a significant difference in longevity and appearance. Using the wrong type of paint for the surface or room conditions can also cause bubbling. For example, using flat paint in a bathroom or kitchen where moisture and humidity are constant issues is asking for trouble. How to Fix Bubbling Paint If you’re already dealing with paint bubbles, here’s what you need to do. The fix isn’t complicated, but it does require some work and patience. First, you’ll need to remove the bubbled paint. Use a scraper or putty knife to carefully scrape away all the loose, bubbling paint. Don’t just paint over it—the problem will only get worse. Once you’ve removed the damaged paint, sand the area smooth so there are no rough edges. You want a seamless transition between the existing paint and the bare wall. Next, address whatever caused the bubbling in the first place. If it was moisture, fix the leak or improve ventilation. If it was poor surface prep, clean the area thoroughly with a degreaser and let it dry completely. This step is crucial—skip it and the bubbles will return. Apply a primer designed for your specific situation. If moisture was the issue, use a moisture-resistant or stain-blocking primer. Let it dry completely according to the manufacturer’s instructions. Then repaint the area using quality paint suitable for the room’s conditions. Apply thin, even coats rather than one thick coat, and allow proper drying time between coats. Preventing Paint Bubbles in the Future Prevention is always easier than repair. If you’re planning any painting project, whether it’s a single room or your entire home, take these steps to avoid bubbling. Always prepare surfaces properly by cleaning walls thoroughly and repairing any damage before painting. Address moisture issues by fixing leaks, improving ventilation, and using exhaust fans in bathrooms and kitchens. Choose the right paint for each room—use moisture-resistant paint in high-humidity areas. Pay attention to weather conditions and avoid painting in extreme heat, cold, or humidity. Allow adequate drying time between coats, even if you’re eager to finish the project. And perhaps most importantly, consider hiring professionals who understand Florida’s unique climate challenges and know how to prepare and paint surfaces correctly the first time. Professional painters have the experience to identify potential problems before they start and use techniques that prevent common issues like bubbling. When you invest in quality workmanship, you get results that last. When to Call the Professionals Some paint bubbling is easy to fix yourself, but certain situations call for professional help. If bubbling is widespread throughout your home, if you suspect water damage behind the walls, if bubbles keep returning after you’ve fixed them, or if you’re dealing with textured walls or special finishes, it’s time to bring in the experts. Professional painting services can assess the underlying cause, properly prepare surfaces, and use the right products and
Is Professional Painting Worth the Cost? DIY vs. Hiring Pros

You’re standing in the paint aisle at the hardware store, calculator in hand, adding up supplies. Brushes, rollers, painter’s tape, drop cloths, primer, paint. The total is climbing, but it’s still way less than the quote you got from that painting company. You’re thinking, “How hard can this be? I’ll just do it myself and save the money.” It’s a thought almost every homeowner has had. Professional painting isn’t cheap, and on the surface, DIY seems like an obvious way to cut costs. But is it really the smart choice? The answer depends on several factors you might not have considered. The Real Cost of DIY Painting Let’s start with money, since that’s usually the driving factor. Yes, doing it yourself eliminates labor costs. But DIY painting is rarely as cheap as people expect. You’ll need quality paint, which runs $30-70 per gallon depending on quality. Most rooms need two coats, sometimes three. Then there’s primer, which you shouldn’t skip. Add brushes, rollers, roller covers, painter’s tape, drop cloths, paint trays, sandpaper, spackle, putty knives, and possibly a ladder or scaffolding if you’re tackling high areas. For a single room, you might spend $150-300 in supplies. For a whole house? Easily $800-1,500 or more, depending on size and quality of materials. And here’s the kicker—if you mess up and need to fix your mistakes, those costs multiply. Now factor in your time. Interior painting a room properly isn’t a weekend afternoon project. There’s prep work—moving furniture, taping, patching holes, sanding, cleaning surfaces. Then priming and multiple coats of paint with drying time between each. Finally, cleanup and putting everything back. A single room can easily take 20-30 hours for a first-timer. Your entire house? We’re talking 100-200 hours or more. What’s your time worth? If you could be working, spending time with family, or simply relaxing instead of painting for weeks, that’s a real cost even if it doesn’t show up on a receipt. Quality Matters More Than You Think Here’s an uncomfortable truth: most DIY paint jobs don’t look as good as professional work. You might not notice the flaws at first, but they’re there—visible brush strokes, uneven coverage, paint drips, wobbly lines where wall colors meet, texture showing through in spots. Professional painters have years of experience and know techniques that ensure smooth, even coverage. They understand how much paint to load on a roller, the right brushstrokes for different surfaces, and how to achieve crisp, clean lines. They know when you need primer and when you don’t, which products work best for different situations, and how to handle tricky areas like textured ceilings or intricate trim. The difference becomes obvious when you see the results side by side. Professional work looks seamless, with uniform color and a beautiful finish. DIY work often looks… well, homemade. If you’re planning to sell your home soon, this quality difference matters even more. Buyers notice sloppy paint jobs, and they’ll either ask for a price reduction or mentally add the cost of repainting to their post-purchase budget. Either way, it affects your bottom line. The Skills and Tools Professionals Bring Professional painters have specialized equipment that most homeowners don’t own and wouldn’t want to buy for a one-time project. High-quality sprayers for cabinets and exteriors, commercial-grade rollers and brushes, proper scaffolding and ladders for high areas, texture machines for matching existing finishes. Cabinet painting, for example, requires specific tools and techniques. Professionals use HVLP sprayers to achieve that smooth, factory-like finish on cabinet doors. Trying to brush or roll cabinets yourself typically results in visible brush marks and an uneven appearance. Beyond tools, professionals know how to properly prepare surfaces—arguably the most important part of any paint job. They know which repairs need addressing, how to clean and sand surfaces for proper adhesion, when to use specific primers, and how to spot potential problems before they become bigger issues. They also understand paint chemistry and how Florida’s climate affects drying times, coverage, and durability. That knowledge prevents common problems like peeling, bubbling, or premature fading that often plague DIY jobs. When DIY Makes Sense Let’s be fair—there are situations where DIY painting is perfectly reasonable. If you’re painting a small room with simple, straight walls and no complicated trim work, and you have the time and patience to do it right, DIY can work. A home office, a guest bedroom, or a simple bathroom are manageable projects for motivated homeowners. If you’re working with a tight budget and have more time than money, DIY might be your only option. Just be realistic about the time commitment and be willing to take the extra steps to do it properly—don’t rush through prep work or skimp on quality materials. Some people genuinely enjoy painting and find it therapeutic or satisfying. If you’re one of those people and you approach it as a hobby rather than just a cost-saving measure, by all means, go for it. When You Should Definitely Hire Professionals Some projects are absolutely worth hiring professionals, no question. Exterior painting tops this list. Working on ladders for extended periods is dangerous, and exterior surfaces require specific preparation and products to withstand Florida’s weather. The safety risk alone makes this a job for professionals. Multi-story homes or homes with high ceilings fall into the same category. The equipment needed to reach these areas safely isn’t something most homeowners have, and working at heights significantly increases injury risk. Large projects that would take you months to complete are better left to pros who can knock them out in a week or two. Living in a half-painted house for months while you work on it in your spare time is exhausting and disruptive. If you’re preparing to sell your home, professional work is worth every penny. The return on investment is strong—professionally painted homes sell faster and for more money. You’re not the one who’ll be enjoying the results long-term, so spending months of your life DIY painting makes even less sense. Projects
The Best Exterior Colors for Commercial Buildings: Transform Your Business’s Curb Appeal
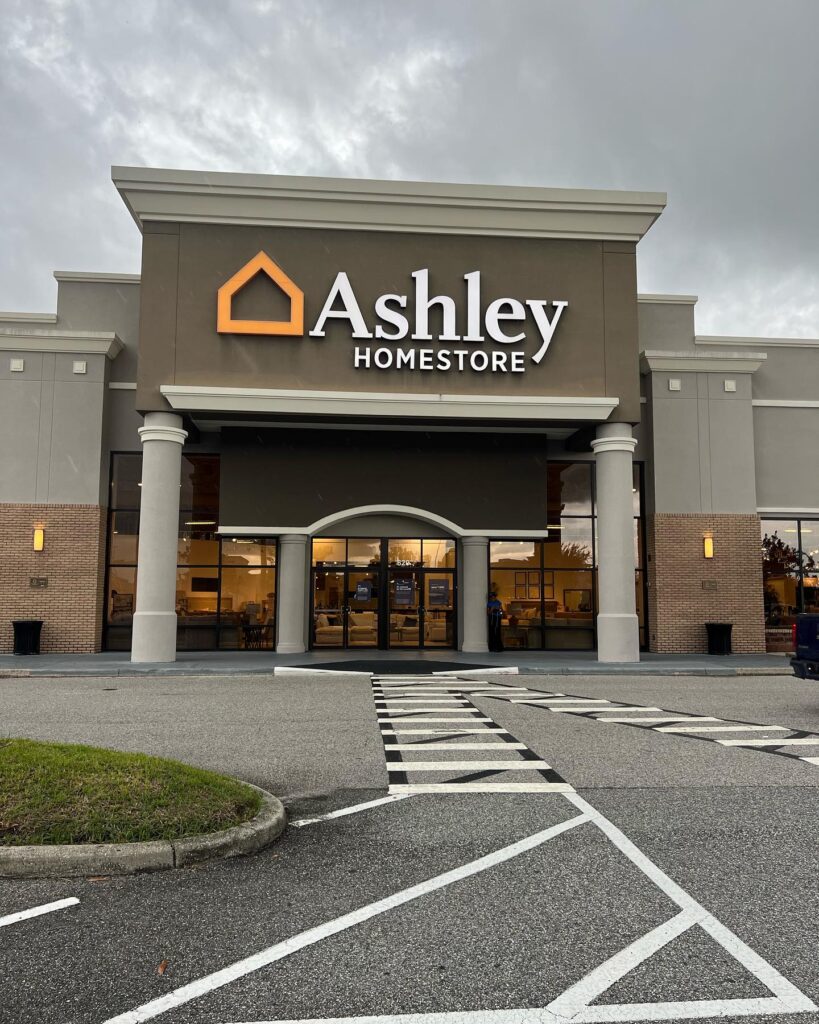
10 Vibrant Choices for Commercial Building Facades That Make a Lasting Impression Why Choosing the Right Exterior Color Matters When it comes to enhancing your business’s presence, the best exterior colors for commercial buildings play a crucial role. The right color not only ensures your building stands out but also sets the tone for your brand. First impressions count, and a well-chosen exterior color can attract potential clients, enhance the overall appeal of the neighborhood, and even increase property value. In a world where competition is fierce, having the best exterior paint for commercial buildings is more important than ever. It reflects your business identity and can influence customer perceptions. Let’s delve deeper into the top choices for commercial building colors and how they can transform your commercial space. Top Picks: Best Exterior Colors for Commercial Buildings Here are ten remarkable colors that can breathe new life into your commercial building’s facade: 1. Classic White White exteriors symbolize cleanliness and simplicity, making them a popular choice for a range of business types. Whether you’re operating a restaurant, office, or retail store, a classic white facade can create an inviting atmosphere. 2. Bold Blue Blue evokes feelings of tranquility and professionalism. Choosing a bold shade of blue can help your commercial space stand out while communicating reliability and stability. Brands like banks and tech companies often use this color. 3. Elegant Grey Grey is increasingly becoming a favorite among businesses looking for a modern touch. From light to dark shades, grey can offer a sleek and sophisticated appearance. This color pairs well with various accent colors, making it a versatile option. 4. Inviting Green Green signifies growth, renewal, and sustainability, making it an ideal choice for eco-friendly businesses. Popular green exterior paint colors can help establish a strong identity for gardening centers, organic restaurants, and environmental organizations. 5. Warm Beige Beige provides a welcoming and earthy vibe that resonates well with customers. It is a neutral color that works great for businesses aiming for a cozy and friendly atmosphere, such as cafes and boutiques. 6. Modern Black Black exteriors create a bold and contemporary impression. While it may seem unconventional, many businesses leverage black to stand out against a vibrant backdrop. It’s perfect for high-end retail spaces or modern offices. 7. Vibrant Red Red is all about energy and excitement. It captures attention and can be a great choice for restaurants, automotive businesses, or any company that wants to convey enthusiasm and passion. 8. Trendy Yellow Yellow is synonymous with happiness and warmth. It can light up a space and is often used by brands that wish to promote a fun and cheerful image, making it ideal for daycare centers and entertainment venues. 9. Soft Pastels Soft pastels can lend a charming, whimsical quality to your building. Depending on your brand’s personality, these hues can create a relaxed and inviting vibe, making them suitable for health and wellness businesses. 10. Unique Two-tone Combinations Combining two colors can leave a lasting impression and fit a variety of styles. Choose two tones that complement each other well. For instance, a bold color paired with a neutral backdrop can add depth and maintain elegance. Considerations for Choosing Exterior Paint Choosing the right color is only part of the equation when selecting the best paint colors for commercial offices. Consider the following factors: Brand Identity: Your exterior colors should reflect your brand’s values and the image you want to convey. Surroundings: Analyze the colors of neighboring buildings. Striking a balance between standing out and fitting in is essential. Climate: Lighter colors can help reflect sunlight in warmer climates, while darker colors can absorb heat. Durability: Choose paints designed for exterior use that can withstand weather conditions without fading or peeling. Popular Commercial Exterior Color Schemes Here are a few trending commercial exterior color schemes that businesses are embracing in 2023: Navy and White: A timeless combination that exudes trust. Charcoal and Yellow: Offers a modern edge while maintaining warmth. Soft Grey and Deep Green: Creates a sophisticated, nature-inspired look. Rust and White: A striking industrial vibe that can highlight a firm’s uniqueness. Conclusion Selecting the best exterior colors for commercial buildings can significantly impact your business’s success. Whether you opt for classic tones or trendy shades, each color tells a story about your brand. Evaluate your options based on your brand identity, surroundings, and customer expectations. The effective use of exterior color can create a captivating appearance that draws in customers and enhances community value. Feel free to share your ideas or questions about choosing the best exterior colors for your commercial building. Let’s choose wisely to ensure your brand shines!